Saturday, January 26, 2013

Coconut Flour Pancakes...

While I have a pork butt slowly smoking on the Egg this morning; last week I made breakfast for my family. My daughter had requested pancakes... Not something you want to have while trying to avoid grains, gluten, carbs, etc...

I found this recipe here at Nourishing Days.

I am not much of a baker really; but the recipe was pretty easy to follow. The pancake batter is a lot thicker than with normal flour and the pancakes themselves wind up more of a silver dollar size. Very dense; but still fluffy, and with a subtle almost cake like taste. I topped them with melted butter, fresh raspberries, and some organic maple syrup, and served them with some sage sausage.

Family really like them and they were a filling breakfast. Just 3 little pancakes and we were all good till a late dinner...

Follow the link above and try these out...


Enjoy,

Ed

Wednesday, January 23, 2013

BBQ Beef and Red Cabbage Slaw...

This past Sunday; I wanted to enjoy some playoff football, some family, and the nice weather... Can't think of a simpler or tasty way than to do some BBQ on Egg!

Decided that this time it would be beef instead of pork for the slow smokey cook. After doing a little reading on the BGE Forum; I decided to try Clay Q's Pulled Beef from Dizzy Pig's recipe page. Friday night I was up at Shady Maple and picked up two 4 pound chuck roasts for this cook.

Like most directions; I always take them more as suggestions rather than hard and fast rules. Certainly makes cooking and egging more interesting and entertaining...

Clay Q's recipe advises to expect about an 8 hour cook. With the football starting at 3PM; I wanted to have the beef ready around 5PM; so doing some sophisticated figuring, that meant I should be shooting to have to beef on the Egg at about 9AM.

Got the Egg cleaned out; filled with a new load of lump, and fired her up. Once the temp stabilized at 250F on the dome temp I threw in about half a dozen chunks of hickory and put the plate setter on legs up for an indirect cook..

Here are chucks in the rack... The night before I injected them with the Wegman's Santa Fe marinade. Under the rack and in the pan was going to be a couple of onions and and two cans of Guinness. I gave them a good dusting of Tasty Lick's Black Bart Brisket Rub. Following Clay Q's suggestion; I applied a layer of bacon to help with both the flavor and to add some moisture to the party.


And here they are on the Egg... Stage one involved getting the internal temp to 160F before moving onto the braise portion of the cook.


Once the beef was on it's way; it was time to make the Red Cabbage Slaw. I wanted to be tangy and a nice counter point to the richness of the beef. Decided to keep about as simple as possible; red cabbage and a basic vinaigrette. Olive oil, red wine vinegar, sea salt, pepper, onion powder, and seasoned salt. Shredded the cabbage, coated the cabbage with the vinaigrette and put it in the fridge to get happy for several hours while the beef cooked.


Here is the beef after about 6 hours. Not sure why; but these chucks never got to 160 when expected, they stalled around 151 before I pulled them off the rack and they went right into the pan with the onions, Guinness, and drippings. I covered the pan tightly with foil and put it back on with the dome at about 300F to wait for the beef to come up to the end temp of 210F.

 
In the end; all was well... Based on the way the chucks smelled cooking on the Egg in the crisp air I had to abandon plans for doing step 3 of Clay Q's recipe and simply shredded the beef and served it with the slaw.

Everyone loved it, especially the bacon  being left into the mix as well... Sorry for the very informal plating picture; but we were being very causal at that point in the evening. Did I mention that Monday was holiday for President's Day?

A good time was had by all...

A pretty easy cook overall with some really tasty results...


Enjoy,

Ed

Tuesday, January 22, 2013

Fire Roasted Salsa and Grilled Chicken...

Over the 3 day weekend I was able to take advantage of the nice weather and do most of my cooking outside; on the Egg, the way nature intended...

I wanted to try something new; and decided that fire roasting up a bunch of fresh veggies and pairing them with some grilled chicken sounded just right. Fresh, healthy, and not to heavy...

No special recipe here; my basic wing it process applies to this one.

Here the fresh veggies; washed and ready to go...

 Cut, and and removed the cores and seeds from the peppers. I then tossed them all with some olive oil and seasoned them with sea salt and pepper. I had the Egg prepared and was going to cook them direct at about 350 for about 45 minutes or until they got a nice char on them.

Just on the Egg. This set up in from the Ceramic Grill Store, The PSWoo3 and the now unavailable Woo Extender. They make great products and their customer service is top notch as well...

Here they are ready to chill in the fridge for bit before I complete the salsa...

 While waiting for the veggies to cool a bit; I prep the chicken for the grill. Tossed with a little Wegman's Basting Oil and some Dizzy Pig Jamaican Firewalk . Great rub with some heat and touch of citrus sweetness.

 After putting the chicken on the Egg to begin cooking; I finish up on the salsa. The veggies are rough chopped and the tomatoes peeled before being chopped and added. To finish the salsa; I added some fresh chopped cilantro and minced garlic, along with a little extra virgin olive oil and some fresh lime juice. Also added some sliced black olives too...

After the chicken finished cooking; to 165 on an instant read thermometer, it was time to plate the meal. Topped it with some freshly sliced avocado. My family gave this meal two thumbs up and enjoyed the salsa even more the next day with some corn tortilla chips.


Don't be afraid to throw your veggies on the grill and let them get some fire time...

If you do make the salsa or this dish; let me know how it turned out.

Enjoy,

Ed

Saturday, January 19, 2013

Another Good Weeknight Meal... Pork

Like my last post; this one is another meal that's possible to get to the table without too much fuss and will leave leftovers for lunches.
 Pork tenderloins are are great source of protein and are low in fat (if you're worried about that sort of thing)... The veggies in this dish are pretty straight forward as well.
  The tenderloins are usually packed in packs of 2; so I would recommend cooking them both. Again, I did these direct on my egg; you can use the grill or method that works best for you. Just a side note; the more I cook outside, the less there is to clean up inside which can make dinner (at least the prep and clean up part) go much faster and leave more time for the important part which is sitting down with your family.
The veggies this time were cauliflower and eggplant. I grilled both on the egg. Cauliflower was a yes, the eggplant? Not so much. Never been a big fan of eggplant, and this cook didn't help. I am going to have to keep trying to find a way to prepare it that will work for me...


 The tenderloins are pretty easy to make. As you can see; when I grill tenderloins, I double back and tie the thin end so it is about the same thickness as the rest of the loin. This allows the entire length to cook more evenly so you don't wind up with the overcooked and burnt thin end. Cooked over direct coals, the dome temperature on my eggs was around 350 with the grid at normal level.


 Here they are on the fire... seasoned them simply with some Wegmans Basting Oil, sea salt, pepper, and garlic salt.


 The cauliflower was tossed with some basting oil as well and dusted with some Dizzy Pig Dizzy Dust BBQ rub. I cooked them on the egg in a grill basket once the pork was done. Cooked them until they were fork tender and had a slight char on them. Tossed them in a bowl with some shredded cheese.


And here is the plated meal... was very good (except for the eggplant).


Success on the pork and cauliflower... Fail on the eggplant. But that's what this blog is about; what works and sometimes what doesn't.

Enjoy!

Ed

Good Weeknight Meal...

Like most people; my wife and I can be pressed for time at the end of the day to get something healthy on the table for dinner. Luckily for us; our daughter Elise is pretty adventuresome when it comes to food for a 9 year old, so we can try more things for dinner without having to always have a plate of chicken nuggets nearby (not that's there anything wrong with that)...

This is just a classic meal of chicken, veggies, and potatoes with a paleo twist... The potatoes are actually cauliflower!

This meal is easy and quick to prepare...

The organic chicken breasts can be cooked any way you normally do your chicken. My preferred and recommended method of course is to do them on your Egg or whatever grill you happen to have. Cooking over fire is always better than cooking inside. Another thing I recommend is buying the chicken in bulk and then cooking the entire batch. For me in this case it was 10 breasts. Left over breasts can be sliced up for salad and used in other recipes in the following nights to take care of the protein component of your meals.

The veggies are even easier...

First the strings beans. I used a bag of organic string beans and simply steamed them right in the bag using the microwave. When they were done, tossed them in a bowl with some garlic infused olive oil and some sea salt.

The cauliflower was pretty easy too and turned out to be the star on this plate. I used two heads of organic cauliflower, stemmed and cut up into little chunks, removing any of the tougher stem parts. Cooked them in microwave until tender and then turned them into "potatoes". Used my blender and pureed the cauliflower, adding melted butter, sea salt,  fresh ground pepper, and a little garlic salt. Blended them until everything was smooth and about the same consistency as normal mashed potatoes. They turned out great.

If you want to make this healthy meal even quicker, use chicken from an early cook and just reheat along with the fresh veggies...

Here is the plated meal...


Enjoy!

Ed

Sunday, January 13, 2013

Ribs... A Quick Post

Some of my wife's family were coming into town this weekend and I wanted to do a little egging to show off the egg a little since they have heard about it; but have never eaten anything made on one. My wife's cousin Mark is a foodie like me and when we get together, a lot of the conversation is about food. Our latest cooks, discoveries, favorites... that kind of stuff.

I decided that ribs might be the easiest and best way to provide a taste of the egg without too much trouble and add a little food to their visit.

Picked up 3 racks of baby backs from Wegmans, along with a jar of Wegman's brand Organic BBQ sauce.

This is only the 3rd time I have done ribs on the egg; but will be doing more soon. Wanted to keep it simple. I gave the ribs a pretty good coating of Dizzy Pig Swamp Venom and set them in the rack. The egg was set up for indirect cooking and the temp was stabilized at 300 using Wicked Good Weekend Warrior lump charcoal and about 4 large chunks of hickory for smoke.

Some of visiting family came over while the ribs were cooking. They couldn't wait for later on when we'd be eating...

After about 4 hours, I did the bend test to check and see if they were done. The test is simple. Pick up a full rack at one end with a pair of tongs and if they bend down to about 90 degrees, the ribs are done. Now that they were done, I took them off and gave them an all over light coating of the Wegmans Organic BBQ sauce and returned them too the egg to set the sauce for about 30 minutes.

Put them in a foil pan covered with foil and hit the road... My sister in law kept them warm in a low oven until all of the guys had returned from a Gannon University basketball game (the reason behind their visit).

The ribs were outstanding... The rub, smoke, and sauce all came together really well... Here they are after the sauce has set.


Let me know if you make ribs, how you do them, or if you try them this way...

Have a great day!

Ed

Tuesday, January 8, 2013

Simple Chicken Salad With Organic Mayo

While I had the egg fired up Sunday night for the Cave Man Burgers I wanted to take advantage of a smoking egg to do a little cooking for additional meals during the week...

Picked up a club pack of boneless, skinless, chicken breasts and decided to cook them all for dinners and lunches. Here they are prepped and waiting for their turn on the egg. They were liberally dusted on both sides with some Dizzy Pig BBQ Swamp Venom Rub. Dizzy Pig has a great line of products that will really elevate your cooking, both on the grill and in the kitchen. Check them out when you have  a chance...

After the burgers were done, I converted my egg from a direct set up to an indirect set up using the BGE Plate Setter and the PS Woo3 from the Ceramic Grill Store for doing the chicken breasts.

Once they were done, I pulled them off and into the fridge they went until Monday evening's dinner...

We were out of mayo so I decided to make my own, using Organic Eggs and a recipe that I modified slightly from Emeril's version. It didn't turn out like store bought mayo; it was more like a dressing. Still was pretty good though...

Simple Chicken Salad with Organic Mayo...

Follow the recipe at the end of this post and you can use just about any chicken you have on hand for a quick and easy meal. I just had mine over a bed of Butter lettuce...


Try out the Organic Mayo (will also do fine with regular eggs too) and please let me know what you think...

Enjoy,

Ed

Here's the recipe...

Simple Mayo Dressing

by Edward Harding
Ingredients (About 2 Cups)
    Mayo
    • 2 Large Organic eggs
    • 2 Cups olive oil
    • 2 Tbsp of lemon juice (fresh is best)
    • ½ Tbsp of kosher salt
    • ½ Tbsp of fresh ground black pepper
    Instructions
    Making the mayo…
    You will need a blender or food processor that has a lid opening for adding ingredients while mixing…
    Crack and add both eggs to the blender.
    Add the lemon juice to the eggs.
    Turn on the blender or processor to med speed.
    While running, slowly add the oil to the blender. After all of the oil has been added, continue to mix for another 30sec unit blended well. Turn off once blended.
    Add the salt & pepper, along with any other spices or herbs, and pulse the blender or processor a few times to mix the spices into the mayo.
    Put the mayo into a sealed container (a quart Ball jar works well, or an old mayo jar that’s been thoroughly cleaned) and store in the refrigerator for at least an hour before using.
    Powered by Recipage

    Cave Man Burgers... Going Primal

    Of course the with the New Year, comes resolutions...

    I have decided to make a change for myself and my family. Trying to eat in the healthiest manner possible, along with being active and doing physical activities as a family. Nothing crazy; right now the activity is a simple brisk 30min walk everyday with the family and our two doggies, Bach & Mozart. I'll work into other things as we go.

    In the past I have had good results while following the Atkin's diet, no carb blah blah blah... This is a blog about cooking & eating; not about "not eating". While on the BGE forum, I came across a link to this site, Mark's Daily Apple. It is a site run by Mark Sisson. He is the author of several books, the one that I read is called "The Primal Blueprint". Not shilling for Mark's book or site; just wanted you to know where some of the ideas for my meals have come from and provide links so you can explore as well.

    Anyway... Back to why you are here. The food! I'm not sure if this blog is a food blog with pictures, or will wind up as a picture blog that just happens to focus on food. I'm hoping for somewhere in the middle.

    I'll take you through the steps for the Cave Man Burgers and the recipe will follow at the end...

    The meal is Cave Man Burgers served on a bed of Sauteed Spinach and topped with a Fried Egg.

    Well you can't have burgers without meat! This is about 2.5lbs of 90/10 organic ground beef. You could really use just about any ground meat for this, bison, venison, etc. Just try to make sure you get grass fed meats without chemicals or hormones.

    I know right... A kitchen scale with "Thinner" on it. Very funny...

    Here are the ingredients...

     A sharp knife (the only kind there should ever be) makes quick work of the peppers and onions.

    Here's everything in the bowl ready to be mixed. Best to use your bare hands (washed first of course) with a little water on them so the stuff doesn't stick too bad.

    Of course I'm going to throw in a portrait occasionally of my Egg... The blog's called "Eggin' With Edward after all.


     I set the Egg up to grill the burgers directly. Down on a cast iron grate just above the coals until they were seared and then I moved them up higher to finish. When you start down just above the coals, the dome temp can be between 350F - 400F, since it will be much hotter on the lowered CI grate.

    Here are the burgers prepped to go on. While not in the recipe; feel free to add any rubs or seasonings. The burgers have a nice little coat of some Tasty Licks Black Bart Brisket Rub.

    Once the Egg temp has stabilized and the CI grate is nice and hot; you can put the burgers on the flames. No better sound than meat hitting hot cast iron. No better smell either... Just ask my neighbors.

    After they are seared; and you moved them up higher off the coals to finish cooking, its time to start on the rest of the meal.

    The spinach bed is really an easy thing to cook. It's basically some oil, sauteed garlic, and the organic spinach with some salt (always kosher) and pepper to taste.

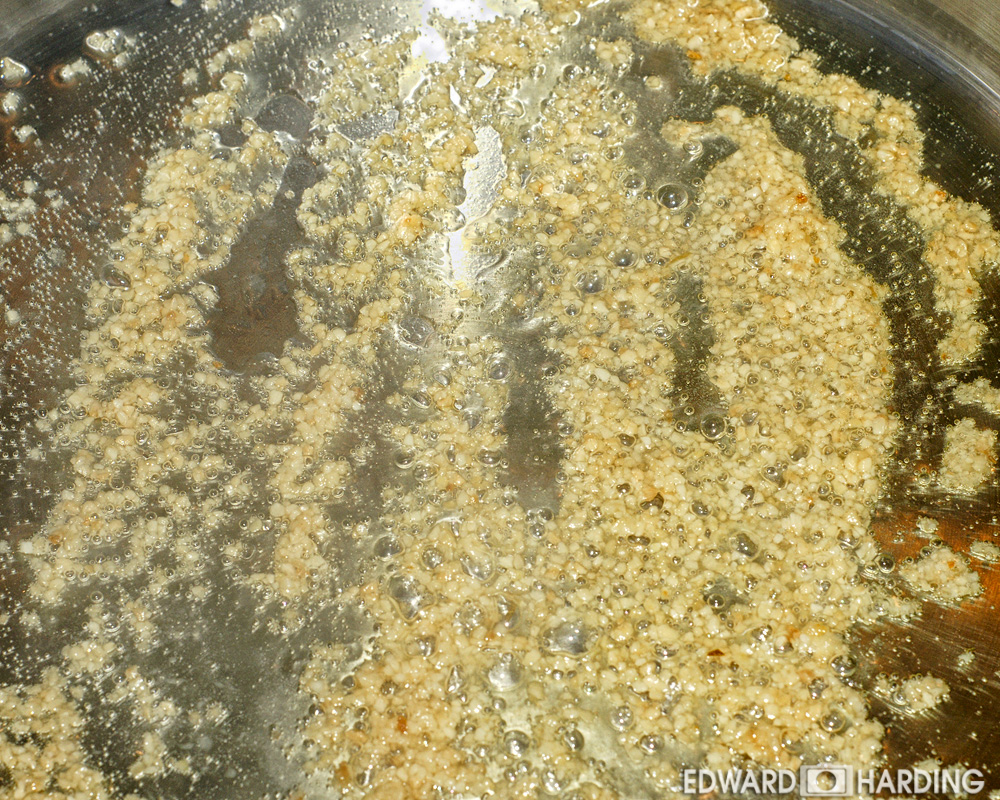
    Here is garlic sauteing in the oil. A braising pan works well for this dish.

    And the spinach just after it has been added and tossed...

     All this cooking and running back and forth from the stove to the Egg is thirsty work...
    I'm pretty sure that cavemen didn't have Guinness... But they would have loved it if they did.

    Here is what the spinach should look like when it's done. Just turn it down to the lowest setting to keep it warm while the burgers finish and you fry the eggs.

     Once the burgers are finished and have reached at least 165F internal on an instant read thermometer; set them aside to rest for about 5 to 10 minutes to let the juices settle. Now it's time to fry up your eggs and plate the meal... I like to fry the eggs in a little butter, the way it's supposed to be done, no margarine or cooking spray here...

    Here is the finished dish... place a portion of the spinach on the center of the plate and set a burger onto it, then top it with a fried egg. You can garnish with some of the cheese and a little olive oil if you like.


    Very healthy and hearty meal... lots of protein, iron, and very little carbs.

    Here is the recipe and ingredient list...


    Gourmet Cave Man Burgers

    by Edward Harding
    Ingredients
    • Ingredients (This will yield 4 entrée servings)
    Burgers
    • 2.5lb to 3lbs of 90/10 ground beef (organic beef if you can)
    • 2 Jalapeno Peppers – Cored & seeded.
    • 2 Medium Onions
    • 1 Tbsp of kosher salt
    • 1 Tbsp of garlic powder
    • 1 Tbsp of fresh ground black pepper
    • Asiago cheese - shredded
    Spinach Bed
    • 11oz package of Organic Baby Spinach
    • 4 Tbsp of olive oil – Enough to coat the bottom of a sauté pan well.
    • 2 Tbsp of minced garlic
    • Salt & Pepper to taste
    Eggs
    • 4 Large Organic eggs
    • 2 Tbsp of butter
    Instructions
    Making the burgers…
    Chop peppers into a small dice. Do not touch your face until you have washed your hands or make sure you were gloves.
    Chop onions into a small dice.
    Mix all of the listed ingredients thoroughly; adding the cheese to taste. For this batch, I used a couple of big pinches
    If grilling; prep your grill and coals according to you particular equipment. Set up to grill the burgers directly.
    If you are doing these in a pan, heat the pan (should be oven proof) on med heat on the stove top. Turn on the oven to 350.
    Form the mixture into large burger / meatloaf sized patties. This batch yielded 4 burgers.
    Grilling – flip after about 8 minutes and then move off the direct heat and cook until the internal temp is 165F.
    If pan frying – sear them in a little bit of oil until the meat browns about ¼ of the way up from the bottom. Flip and sear them until the same on the 2nd side. Flip again and then place the entire pan in the oven and cook until to an internal temp of 165F.
    Making the spinach…
    Use a pan that will hold all of the spinach and that has a lid. A braising pan will do nicely for this cook.
    Heat the oil and minced garlic over med heat.
    Once you can smell the garlic cooking; add all of the spinach and cover pan with the lid.
    After a few minutes; toss the spinach carefully with tongs, making sure to coat as much as possible with the oil and garlic.
    Add salt and pepper to taste and turn the heat down to low.
    Check occasionally and stir, the volume will be greatly reduced.
    Making the eggs and finishing…
    Once the burgers reach the 165F internal temp, remove them from the grill or oven and set them aside to rest for 5 to 10 minutes to allow the juices to settle.
    While the burgers are resting and the spinach is warmed; now it’s to make the eggs.
    Heat a frying pan with med heat.
    Add a pat or two of butter to the pan.
    Once the butter is melted, crack your egg and put it in the pan.
    While the egg is frying, it’s time to prep the plate…
    Take about a ¼ of the sautéed spinach and place it in the center of the plate.
    Place a burger on top of the spinach.
    When the egg is cooked to your liking; place it on top of the burger.
    Garnish with a light sprinkling of the Asiago cheese. You can also drizzle a little extra virgin olive oil over the plate as well if you like.
    Powered by Recipage


    Please let me know if you make this meal and how it turns out.

    Enjoy,

    Ed

    Saturday, January 5, 2013

    Friday Night Snack... Pizza!

    Friday night; long day, minimal dinner... I walked outside on the deck planning on simply enjoying a cigar. As I walked around; I wandered over to my Egg and thought about how I probably wouldn't be egging anything until Sunday as we going out to dinner on Saturday night.

    When I walked back inside to retrieve my beverage; I said to my wife in passing that I felt like egging something. Her immediate response was; "why don't you do a pizza". Hmmm, what do I have on hand that I could use? I normally don't do any shopping until Saturday or Sunday mornings, so I figured I would have to wing it (like I usually do).

    After a quick check of the fridge and freezer; I found a thin crust pizza shell from Shady Maple, left over from a pizza night a few months ago, a container of mozzarella cheese, a can of black olives, and a freezer bag of BBQ pulled beef that I had made back over the summer.

    No sauce anywhere. Okay, no problem. Set a pot of water on the stove with the bag of BBQ beef in it to thaw it out, put the cheese in the microwave to thaw it out, and headed outside to get the egg fired up.

    Put some new lump (Wicked Good) on top of the leftovers from my last cook; and used my Looftlighter to get it started. After a few minutes, I had a nice little area glowing red. Loaded in my grate and pizza stone set-up and went inside to check on the ingredients while the egg got up to pizza baking temps. I like to do pizzas anywhere between 600F - 800F on the dome thermometer.

    All the ingredients were ready... The pie was assembled very simply. Heavy layer of the mozzarella, a couple of good handfuls of the black olives, and then topped it with the BBQ beef and a little shredded Parmesan that I found. I think the beef tasted better than when I made it months ago...

    Took the pie out to the egg and set it on the stone. The egg and stone had gotten up to a nice and toasty 650F. After about 9 minutes, the crust was nice and crisp and the cheese was melted. Grabbed my pizza peel and took it off and inside.

    Here is the finished pie...

    For some last minute and simple ingredients; this turned out really well... In the future when I am doing BBQ pulled beef or pork, I will be sure to freeze a bag or two for future pizza creations.

    My wife said this "recipe" had better make it to that blog you started...

    So here it is.

    Have a great weekend everybody!

    Ed

    Tuesday, January 1, 2013

    Great Soup For Winter...

    Looking out the window on this overcast New Year's Day got me thinking about some of my favorite cooks and foods from 2012. This one happens to be one of my all time favorite soups; my Mom got the recipe from her mother and passed it on to me. Here is a picture of the finished product. Like most soups and stews; its even better the next day.
    Here is the recipe...
    German Lentil Soup

    by Edward Harding via Mom & Grandmother
    Ingredients
    • This is for a large pot of soup. You should use at least a 12 QT pot...
    • 2lbs dry green lentils
    • 4 carrots - chopped small
    • 6 stalks of celery - chopped
    • 4 medium sized onions - chopped
    • 4 red potatoes - 1/4" dice
    • 2 bay leaves
    • 2 to 3 teaspoons of kosher salt
    • 2 teaspoons of fresh ground black pepper
    • 6 cloves of garlic - minced
    • 1/4 to 1/2 pound of bacon chopped ( I used Canadian (1/4" dice) this time)
    • 4 smoked ham hocks ( you can use more, but at least 4)
    • 1 small boneless smoked pork shoulder (this is my choice, not part of the original recipe)
    • 2 Gal of water. I have used potato water as a stock before (from the Thanksgiving potatoes)
    • In a large stock pot...
    • Heat a few tablespoons of oil...
    • Saute bacon until crisp, add onions until golden
    • Add carrots, celery, garlic, bay leaves, S&P. Cook until carrots are softened slightly.
    • Place smoked ham hocks, pork shoulder, and lentils into the pot.
    • Add enough water / stock to cover well
    • Bring to a boil, stirring occasionally
    • Turn heat down to medium low and simmer soup with the lid slightly open for a few (3?) hours...
    • Remove smoked ham hocks and pork shoulder. Cut boneless shoulder into bite size pieces. Cut any meat on the ham hocks off and return it to the soup along with the pork shoulder.
    • Add kosher salt & pepper to taste.
    • Serve in big bowls with crusty bread
    Powered by Recipage
    Please let me know if you make it and how it turned out...

    Ed

    The Outdoor Kitchen / Snow Day Cook...

    Wanted to introduce everyone to our outdoor "kitchen"... The place where my Egg lives. We had the deck enlarged back in June and it gave my egg a little more breathing room as well as providing us more relaxing and entertaining space. We try to spend as much time out there as possible... My cooking set up isn't complete yet; as I haven't decided on what type of table or cabinet set up I want to go with.

    Here it is in Spring / Summer mode...


    And here it is during our first snowfall of the season... You can see I added a set of lights to help with egging after dark.

    Don't worry; the egg doesn't care about snow... It cooks as easily in the bad weather as it does in the nice.

    The snow day cook was some Turtle Eggs (Credit Chris G at Nibble Me This for the inspiration and recipe) followed by some Guinness Beef Stew done in a cast iron Dutch Oven on the egg.

    Here is a finished turtle egg...


    And here is a bowl of the stew...


    Here is the recipe for the stew. Fairly straight forward and simple to do...
    Guinness Beef Stew (Revised as of 12/29/12)

    Guinness Beef Stew

    by Edward Harding

    Ingredients

    • 2lbs stew meat
    • 2lbs little red potatoes
    • 1 large onion chopped
    • 1/2 a bag of the baby carrots (cut them in half)
    • 1 cup of flour
    • ? of your favorite rub
    • canola oil
    • 1-1/3 cup of beef broth
    • 1 can of Guinness (may add more if additional liquid is needed)
    • 1 packet of McCormick's Beef Stew Seasoning
    • 1 can of peas
    • 1 heaping tablespoon of minced garlic
    • Salt & Fresh Ground Pepper to taste
    • Heat the DO direct over a 350 - 400 dome temp fire... I use Wicked Good Weekend Warrior with 3 chunks of Mesquite.
    • In a freezer bag, combine the flour and as much rub of your choice to taste.Add the meat and shake to thoroughly coat the beef.
    • Once coated, heat some oil in the DO and brown the meat... stirring a couple of times. When pretty browned, remove beef and add some more oil.
    • Add the onions and carrots to the pan along with a tablespoon of minced garlic. Stir occasionally and when the vegs are tender, add the seasoning packet and broth. Stir it around and be sure to loosen any stuck on goodness...
    • Add the beef back to the DO and place the potatoes in as well and stir to mix and coat everything.
    • Add the can of Guinness...
    • Let it simmer, stirring occasionally for about 1-1/4 hours with the top off. Once the potatoes are tender; add the peas and stir it to mix and let it cook for another 15 mins, season to taste with salt (kosher) and ground black pepper, and then pull it off and serve....
    Powered by Recipage


    This can be made on a stove top or in the oven; without the smoke and cooked over an open flame properties. If you do make the stew; please let me know how it turned out...

    Ed

    Happy New Year...

    I decided a few weeks ago that I wanted to do something a little more "eggcentric" with my typical Facebook posts about cooking on my Big Green Egg... This blog will serve as that outlet; with recipes, pictures, tips, and general info and reviews about products, techniques, and really anything having to do with cooking and eating.

    Ever since I was a kid; I have always been interested in cooking (and eating). My wife and I received a gas grill for a wedding gift and I couldn't wait to put it together and get it on the deck. That was a little over 12 years ago... Since then; I've been thru two gassers and in April 2012, after about 8 hours of intense on-line research, I jumped into the world of the Big Green Egg. I brought my assembled Large home on a very rainy Sunday afternoon and got it onto the deck with a little help from my brother in law. Loaded it with lump and fired it up... Haven't looked back and most of our meals are cooked on it. Other than making some sauces and serving as a warming station; our stove has become the biggest digital clock in the house. My only regrets are that I didn't get an XL sized egg to start, and that I didn't get a Big Green Egg years ago...

    Anyway, I am looking forward to sharing more of my cooking adventures.

    Ed